Terra Cotta Mural 101
Following are pictures of the terra cotta ("water clay") mural, "Under the Sea," a commissioned piece for the Wolfe School in Monroe NC. The mural is being produced in three panels of two feet by three feet each, to be mounted together in a 3' x 6' mural. The pictures are shown to show the process of creating the work after the initial sculpting. Since this is water-based clay, the clay must be laid on carefully, making sure no air bubbles are trapped. It must be maintained in a moist condition so it won't dry out before you've finished sculpting it. The working surface shown is marine plywood (the panel the mural will eventually be mounted on) covered with an old bed sheet cut just slightly larger than the board, stretched tightly and stapled in place on the back side of the board. The sheet gives you a good surface to work against, but is also porous enough to allow the clay to start the drying process. When each work session is completed, the entire mural is misted with water, wet rags or towels are applied to the outmost edges to keep them moist, then dry cleaning bag plastic is draped over the entire project. Air is squeezed out and weights put around the sides of the plastic to seal the moisture in. By wetting and wrapping water clay this way, you can keep a piece workable for months at a time, if you're really careful.
The Plan
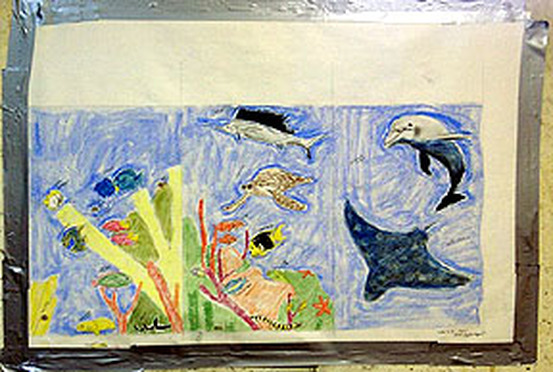
This is a picture of the plan for the mural. I've changed the outer two panels, so the dolphin and ray will be on the left side, adn the left-hand panel will be on the right. Or I may just put the right hand panel to the left of the other two as they sit right now. I'll know which way looks best when I have the actual panels all sculpted and mounted on their individual boards. The first panel I sculpted was the one on your right, the dolphin and ray. As I worked, I decided to change the position of the dolphin to a profile view so it would look more familiar to the children, and wouldn't require as high a relief as this head-on view. One of the criteria for the mural is a safety precaution -- it needs to not have any "ledges" where the children can grab on and pull themselves up. So the sculpture will contain all be fairly low reliefs, but with lots of texture and interesting shapes. I also made the ray bigger in the actual sculpture.
Don't laugh at my drawing - I'm sculptor!
Sculpting's finished
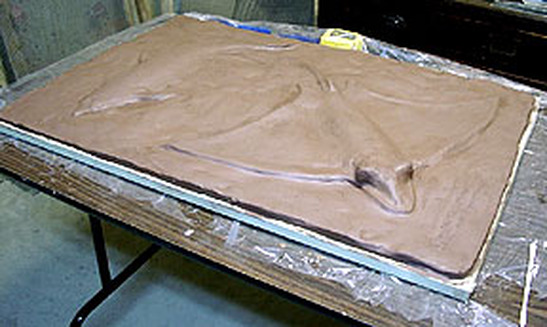
This is the entire first panel of the mural, measuring 2' x 3'. The dolphin is at the left, which is the top of the panel. The background (water) is from 1/2" to 3/4" thick, with "ripples" built in by varying the pressure of my fingers as I applied and smoothed the clay. The piece is solid clay with no armature. The ray's head is about 1 1/2" thick at this point and must be hollowed out, along with part of the center of his body, and the dolphin's body, each of which is over 1" thick. Any clay over 1" thick will crack in a kiln, or possibly explode, so it needs to be thinned to under 1" thick.
Checking thickness
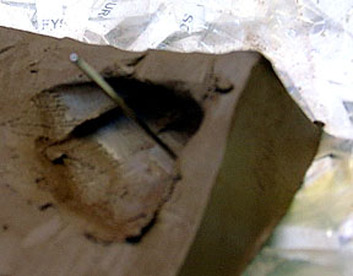
To check the thickness of the clay, you insert a needle from the front, while you're working (since you can't turn it over), or from the back while you're hollowing it out. Only the surface hole needs to be filled after this test -- the needle hole in the back will actually help allow gases to escape during firing. In this picture, you see part of the ray's head being hollowed out (after it's been cut into tiles) and the needle inserted to check the depth. You shove the needle in until you feel it coming out the other side (or if you started from the top, you shove it in until it hits the work surface on the bottom of the clay). Put your thumbnail at the point where the needle and clay meet, then pull the needle out. Measure this length to see how thick your clay is. If your clay is really wet, you'll see the color of the clay on the needle. When hollowing, you want to leave 1/2" of wall around the hollow in order to attach the tile to the mounting board.
Cut into tiles
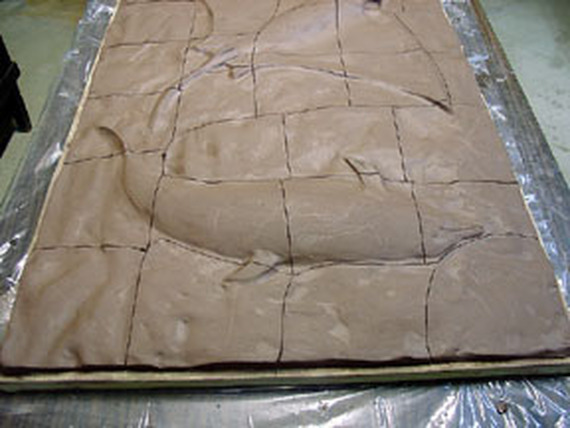
Here you can see the panel cut into tiles. Each tile has to be 6" or less on a side. Tiles over six inches on a side tend to warp or crack. I don't like the look of "regular" tiles, so I varied the size and shapes of the tiles to follow the lines of the sculpture somewhat.
Lift Carefully
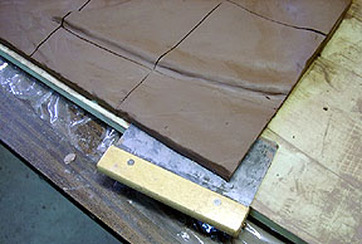
I used a food chopper along with a clay knife to lift the tiles (only the chopper is shown here). You must lift them flat -- the clay has a "memory," and if you curl it to lift it, it will go back to being somewhat curled when it's fired, so I'm told. I was very careful to lift the pieces as flat as possible and keep them flat while working on them.
Round the corners
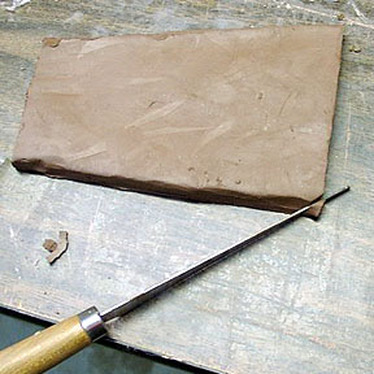
The corners of the tiles must be rounded in order to save trouble if the piece does manage to warp while drying or firing. Also, rounded corners are easier to fit together. I also trimmed the sides of the tiles and rounded the top edges a bit just to avoid having sharp edges that might scratch the children who will be using this mural as a tactile and visual experience.
Trim neatly
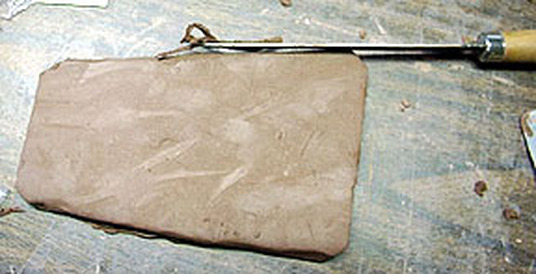
Here you see the mural tile being trimmed with a clay knife. Look closely at the front edge of the tile, and you'll see the crumbs created from carving the texture onto the bottom. That's what I'm trimming away here. This flat tile is part of the water background of the panel.
Rake for texture

A rake tool (with teeth cut in to the edge) is used to create texture on the back of each tile in order for the adhesive to have a good surface to bond to when the tiles are mounted.
Number the tiles
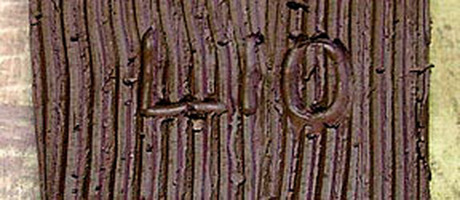
Each tile is numbered to enable easy reassembly. The number shown is "L 10" -- "L" because this is the left panel of the three parts of the mural, and "10" because it's the 10th piece from the bottom left corner, which is where I started lifting the tiles.
Hollowing the thick parts
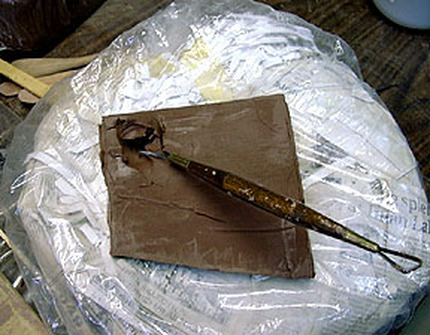
The thick parts of the mural are laid in a "nest" made of shredded paper wrapped in newspaper and masking tape, formed into a bagel shape, covered with dry cleaner's plastic. This nest helps protect the sculpting on the top of the tile while the bottom is being hollowed out. This kind of nest is used for all kinds of terra cotta sculptures, not just for mural tiles. The tile shown is most of the head of the ray. A loop tool is used to hollow out the thick portion. I hold my hand under the tile to feel where the thick portions are so I won't cut through a thin part. I can also poke through the thick parts with a needle from the front of the tile, poking into the back, to make a "map" of where I need to carve. If I do make a mistake and cut through the tile, wetting the clay and then refilling the hole without trapping any air bubbles is still possible at this stage. This work is all done while the clay is still fairly moist, before it gets to the "leather hard" stage. The clay taken out of the interior is wet enough to put back in the clay supply bag and use again whenever needed.
Leather-hard stage
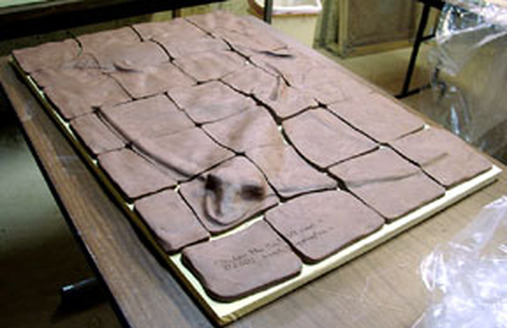
Here you see the mural at leather-hard stage, with a couple of days of drying to do before it can be fired. The thick parts have been hollowed out, the tiles all have their edges trimmed, corners rounded, and texture and numbers on the back. The next step is firing, which will be done at Cornell Studio Supply, Dayton Ohio. After that, I'll apply a white underglaze, then colored underglazes to create the colors of the animals, and a special glaze with crystals in it to make the water. There will be a clear glaze over the underglazes. Underglazes don't soften detail the way regular glazes do, which is why I chose them. The white underglaze will give me a white surface under the colored glazes, so the colors will be as vibrant as possible.
Cushioning the tiles for transport
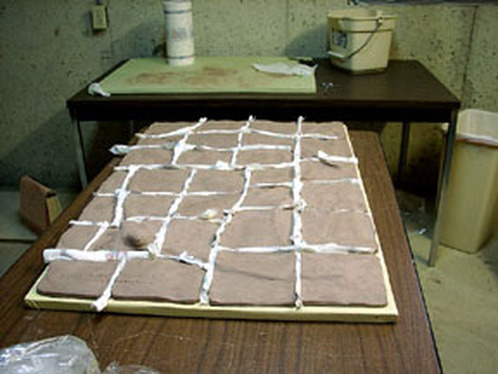
To transport the dry tiles to the place where they will be fired, a small roll of paper towel was inserted between each tile. Then the tiles and the 3/4" marine plywood board they're on were all snugly wrapped in bubble wrap
Packed and ready to go
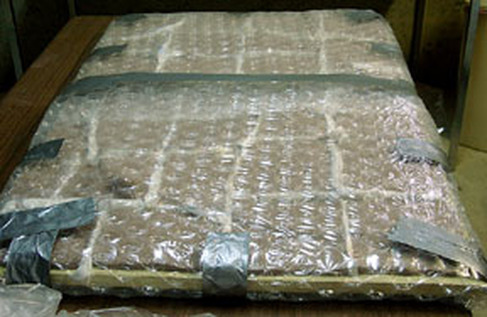
A friend came over to help me carry this up from the basement without tilting it. I drove veeeerrrrrryyyyy carefully over to Cornell's Studio Supply in Dayton, Ohio, where the piece will be fired. The panel was delivered safely today, 13 March 2001. One panel gone to be bisque fired, the second one is already underway. The sailfish is pretty much sculpted on the second panel already, and the turtle and coral reef and a few other details are sketched into the clay.
The finished mural
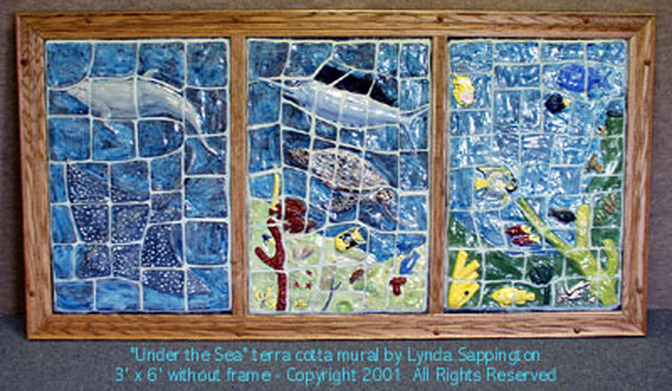
The finished mural was installed in a custom frame made by Diane Soper of Sistermade Woodworking, who makes all my art bases, pedestals and display tables. It was installed in a school in North Carolina as a sensory experience center. I put a final glaze on it that protected it from cleaning products the school needs to use to sanitize things for the severely and profoundly handicapped children they teach.
All photos, artwork, text, the Whimsy Hill Studio name and logo are copyrighted by Lynda Sappington and may NOT be reproduced, copied or used in any way without permission.
All photos, artwork, text, the Whimsy Hill Studio name and logo are copyrighted by Lynda Sappington and may NOT be reproduced, copied or used in any way without permission.
