Digital Enlargement: From Maquette to Life-Size
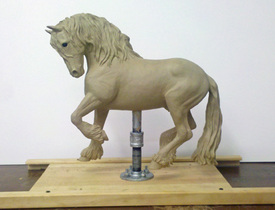
First comes the maquette, which is a small version of what the life-size will be. It has to be as perfect as possible, because when it's enlarged, any tiny mistakes will suddenly be HUGE - in this case, 700 times bigger!!
This maquette (which is in bronze and for sale here: Nanning 374) is a 1/7 life-size portrait of the 17 hand Friesian stallion, Nanning 374. The photo I was given as the pose was from a moment of play - he didn't have a single foot squarely on the ground! For a life-size sculpture to stand in all weather conditions, it must have two to three points of contact with the ground. Somehow I had to "land" him and make him stand securely while maintaining the feeling of awesome controlled power in the pose. I grounded two of his feet and used his tail as the third point of contact so he will be securely installed.
This maquette (which is in bronze and for sale here: Nanning 374) is a 1/7 life-size portrait of the 17 hand Friesian stallion, Nanning 374. The photo I was given as the pose was from a moment of play - he didn't have a single foot squarely on the ground! For a life-size sculpture to stand in all weather conditions, it must have two to three points of contact with the ground. Somehow I had to "land" him and make him stand securely while maintaining the feeling of awesome controlled power in the pose. I grounded two of his feet and used his tail as the third point of contact so he will be securely installed.
First, the Computer Scan
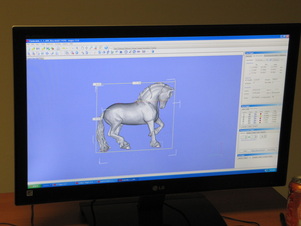
The computer scan was done before we arrived at Additive Workshop in Oregon, so we didn't see how they did the scan. It was fascinating to see the finished scan, though - they could turn it in any direction to see it from every angle! So cool! The same kind of technology was used at this company to help the production company that made the film "Coraline." They were working on another film while we were there.
The scan is used to control the computer that will cut the enlargement out of huge blocks of Styrofoam building insulation. Styrofoam blocks are glued together to the proper size to accommodate the robotic arm that will do the cutting. A board is glued to the bottom of the foam block and that board is then attached to a rotating stand. Both the rotating stand and the robotic arm are computer controlled and run off the scan shown here.
The scan is used to control the computer that will cut the enlargement out of huge blocks of Styrofoam building insulation. Styrofoam blocks are glued together to the proper size to accommodate the robotic arm that will do the cutting. A board is glued to the bottom of the foam block and that board is then attached to a rotating stand. Both the rotating stand and the robotic arm are computer controlled and run off the scan shown here.
The Cutting Room
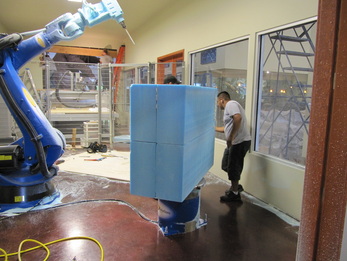
In the foreground, you see the robotic arm, which is the same kind used in the automotive industry. It's 12 feet long with 7 cutting angles. The Styrofoam blocks are made of the kind of blocks used for insulation in office buildings. They're about a foot thick by four feet wide by 10 feet long, if I recall correctly. Here, blocks are glued together to be cut into the horse's head and neck.
In the background is a flatbed router table. The horse's legs and tail were cut out on this table, with each leg and the tail produced in halves lengthwise. The halves were cleaned up and glued together before being attached to the horse's body.
In the background is a flatbed router table. The horse's legs and tail were cut out on this table, with each leg and the tail produced in halves lengthwise. The halves were cleaned up and glued together before being attached to the horse's body.
The head and neck are emerging
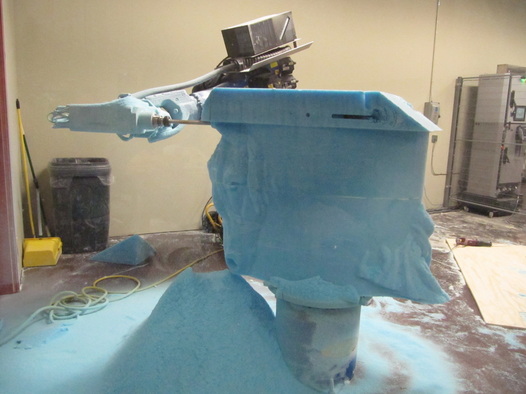
The table turns around and the robotic arm cuts away what isn't part of the design. It's an amazing process!
Next step, painting clay on the Styrofoam
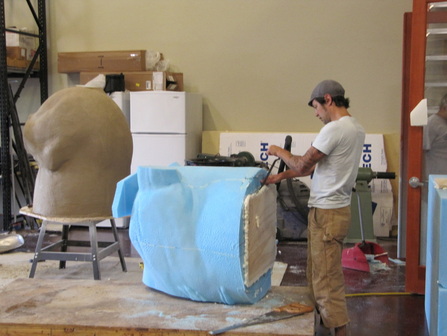
Here you see the back half of the horse's body in the background and the front half lying on its back in front of the worker. The worker is removing the board that was glued in place to attach the foam to the rotating table.
This shop uses Classic Clay, the same as I use. Classic is great because it can be frozen, softened, melted or sprayed on and it doesn't change consistency at all! And there's no bad smell.
They use electric turkey roasters with thermostats set at various temperatures to soften or melt the clay. The roasters are big enough for an entire slab of clay (10 lbs or so per slab). One roaster might be set to melt the clay for painting on, while another might be set just to soften it so it's perfect for sculpting. It's a very useful system.
Painting on and raking back the clay
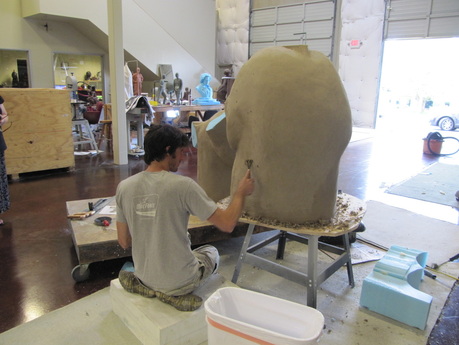
Melted Classic Clay is painted on with brushes, then once it cools, it's raked back to smooth it. Yes, there are rake marks in the clay after they rake it, but the marks get smoothed out and the foundry will chase the waxes to make it even smoother, since they know that's how I want it.
Look at Tim's feet! I have no idea how he manages to sit that way and walk off not limping! LOL. The shop's staff are all really nice folks and I learned a lot from them.
Look at Tim's feet! I have no idea how he manages to sit that way and walk off not limping! LOL. The shop's staff are all really nice folks and I learned a lot from them.
Refining the shapes
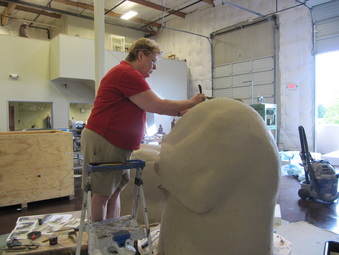
The scanner can't "see" in depressions, so the area between the horse's buttocks had no detail at all. I had to carve back some of the foam to get it back to the shape it needed to be. Then I added clay and sculpted like I normally do to get the shapes and forms the way they should be.
It's remarkably comfortable to work on a life-size that can be cut into pieces like this! I was afraid I'd be up on scaffolding for hours on end, but because it was cut out in pieces, I could stand on the floor and get the detailing done without straining myself - until it came to the last details when he was all in one piece. That's a whole different story!
It's remarkably comfortable to work on a life-size that can be cut into pieces like this! I was afraid I'd be up on scaffolding for hours on end, but because it was cut out in pieces, I could stand on the floor and get the detailing done without straining myself - until it came to the last details when he was all in one piece. That's a whole different story!
Looking more like a horse now
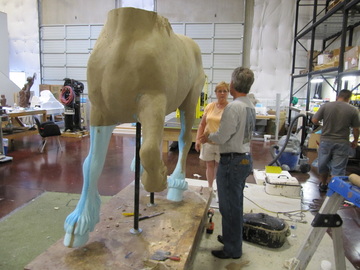
The legs have been glued on, and then two guys just carried the horse to this rolling platform and rammed him down onto those two pipes! Styrofoam is remarkably easy to work with!
That's my customer, Scott Kelnhofer, in the foreground. He came to approve the enlargement and got to help out by painting on clay along with my husband, John, and a lot of the crew.
That's my customer, Scott Kelnhofer, in the foreground. He came to approve the enlargement and got to help out by painting on clay along with my husband, John, and a lot of the crew.
Everything fits!
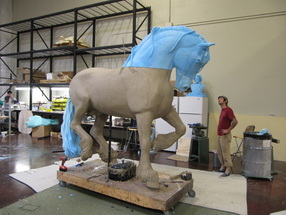
Which is to be expected, actually! There was a small gap under the neck that they shimmed then filled with clay. Nobody seeing the bronze will ever know there was a gap there once upon a time.
Enhancing the details
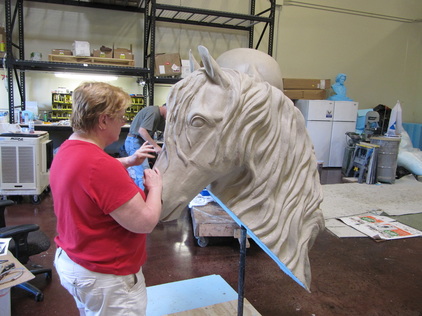
The detail on the piece was perfect for a maquette. In the life-size, it needed to be built up more, refined more, made crisper, all kinds of things to make it look right for life-size. Also, the scanner and robotic arm delete some of the detail just because they're machines and can only refine things so much. That's why artists need to do the finish work. I'm refining the details of his face and forelock, and making sure everything's the way I want it. I had to cut the nostrils back and rebuild them because I wasn't happy with how they looked. I was very happy with him when I finished!
Cleaning up the finished piece
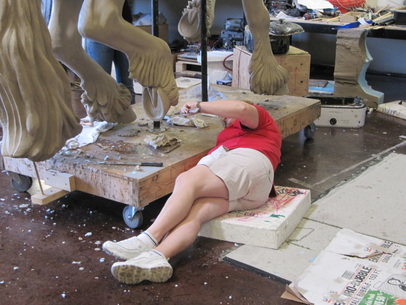
There are always lumps, bumps and crumbs involved when you add clay on. I'm down there making sure the horse's hoof wall is the right shape with no bumps where they don't belong.
Signed and dated
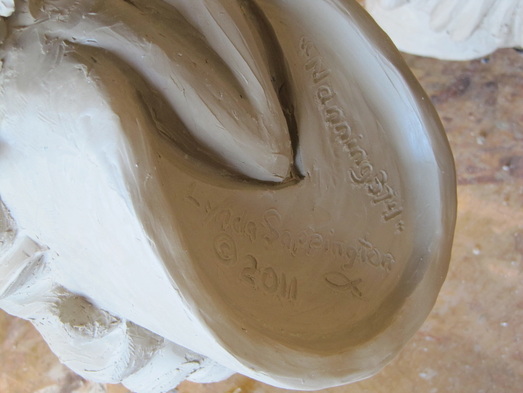
I signed and dated him inside his raised left front hoof. That was a LOT easier than some of the places I've signed sculptures! I barely had to bend over to sign it! I LOVE working this big!!
The finished piece!
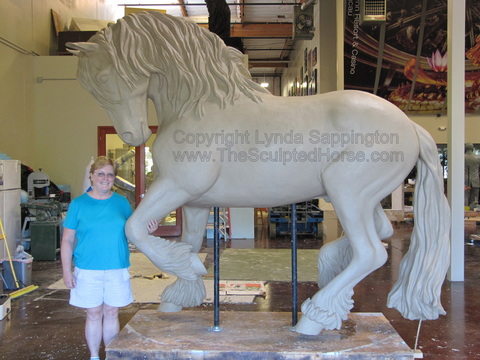
And here he is! I'm really happy with how he turned out!
After this, he was cut into pieces again (head and neck, all the legs and tail removed) to be taken to the foundry on the east side of Oregon. There they made molds all over his body - like a jigsaw puzzle - and then painted wax in the molds. The waxes are waiting for warmer weather to be cast, because the epoxy needed to install him won't cure properly in cold weather. He's also going to be hauled across country on an open flatbed trailer, and we don't want winter road salt to get on him! So he'll be cast probably in March and sent to Wisconsin in April or early May, depending on the weather.
Text, Photos and Artwork all Copyright Lynda Sappington - All Rights Reserved. No reproduction without permission.
