Baking a Super Sculpey Figure
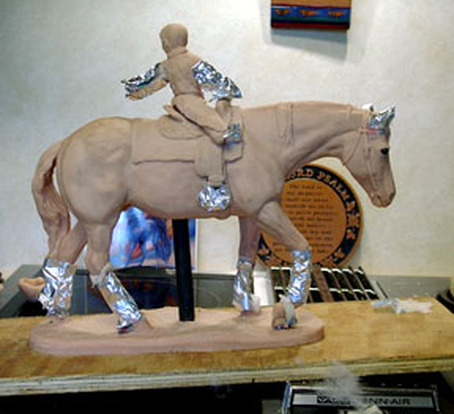
Shown here is "Come On, Boys," a sculpture made in Super Sculpey on a normal aluminum wire armature, being readied for baking. This sculpture is now sold out.
"C'mon Boys"
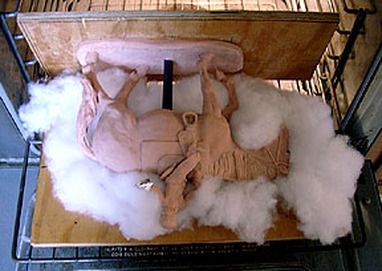
This 11" tall sculpture is too tall for my oven, which is 11 1/2" from the bottom rack to the broiler element. The folks at Sculpey prefer you to add 1/4" of clay to your sculpture, then bake, then add another 1/4" of clay, then bake again, until you get to your final thickness. I primarily work in plastilene, and often change my mind about the position of a leg or the turn of a head partway through a sculpture, so I find it difficult and frustrating work the way Sculpey prefers.
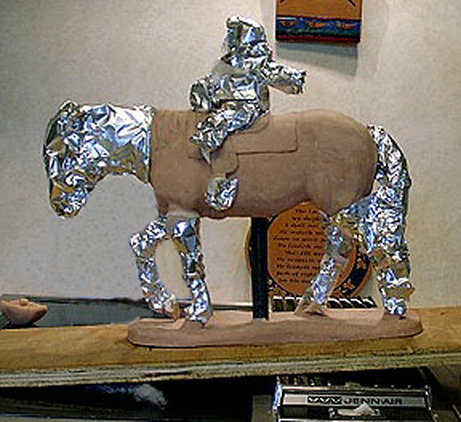
This piece is over 3" thick at the thickest part (the horse's belly), with probably 3/4 of an inch of foil inside it to bulk it out. The good folks at Sculpey suggested I make pillows of Super Sculpey and lay the figure down, or possibly use Polyfil, but they said laying it down was a good idea ONLY if the armature is really strong. Since my piece has so many different levels from the side, I thought it would be easier to cushion it evenly with Polyfil rather than with Sculpey. So above left you see the piece lying on its side on Polyfil, with a piece of plywood under the Polyfil to keep it from falling to the floor of the oven. (One small piece did fall to the bottom, but it never made any odor, nor did it burn up or even get hot. Amazing stuff, Polyfil! ;-> ) This picture shows the piece after it had baked for 15 minutes. The child's outstretched hand is very thin, so after this initial baking period, I wrapped the hand in a strip of wet paper towel and then covered that with foil, to prevent it baking any more and possibly cracking (yes, just like a pie crust edge). As the baking went along, other thin parts were wrapped, thinnest first, in order of size. The horse's pasterns (the skinny part above the hoof) were the next to be wrapped, then the cannon bones (the long thin bone below the knees and hocks). You'll see from the progression of the photos that eventually only the horse's barrel, the thickest part of his body, was left exposed to the heat.
How to Bake the Hat
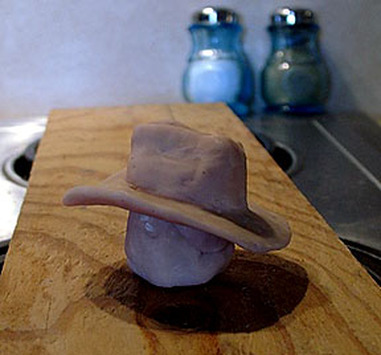
I baked the child's hat separately so his weight lying on the back brim wouldn't warp the brim or leave the hat sitting wrong somehow. I made a lump of Super Sculpey the right size to fill up the hat and lift it off the baking surface (another piece of plywood). Since the hat and the ball of clay had not been worked together or pressed hard together, the ball popped right out when the baking was completed.
Finishing
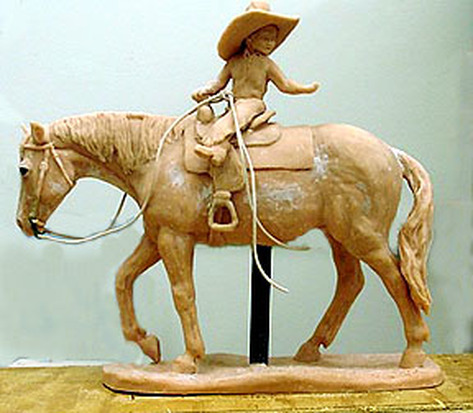
To complete the piece, the hat was epoxied onto the boy's head, and bit shanks I'd made from hard green jeweler's wax were Super Glued to the horse's face. Rawhide cord was slit at the bit ends and the ends glued around the bit ring they're supposed to go through (the reins have to be in place so the caster knows how to do what I want.) Plastilene and Super Sculpey were added to build out the cheek pieces of the bridle to cover the top bit rings, and to attach the curb chain (under the horse's chin -- the chain itself is sculpted in place and baked along with the horse) to the bit rings. Cracks in the horse's body were filled with Magic Sculp (available via the Magic Sculp Website), an epoxy resin that hardens overnight. I pressed it into the cracks with my fingers, then wiped the spot down with a damp towel, leaving a surface smooth enough that I didn't have to sand it at all. Here's the completed piece:
I hope you enjoyed seeing a piece go from start to finish. This piece sold out a couple of years ago. When it was on the market, it was part of the Montana Silversmith's Home Accents line of products along with another piece of mine (also now sold out), "The Rookie" which showed a dog pulling on a horse's tail rather than trying to herd it.
For more detailed info on sculpting, order Sculpting 101: A Primer for the Self-taught Artist.
Text, Photos and Artwork all Copyright Lynda Sappington - All Rights Reserved. No reproduction without permission.
For more detailed info on sculpting, order Sculpting 101: A Primer for the Self-taught Artist.
Text, Photos and Artwork all Copyright Lynda Sappington - All Rights Reserved. No reproduction without permission.
