Sculpting Basics
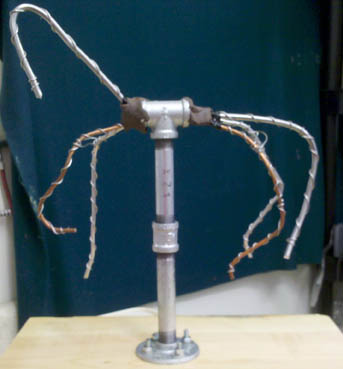
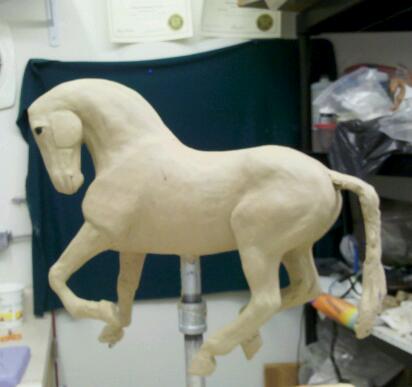
I get so many inquiries about how sculptures are made that I thought I'd show you how they begin, and the result. The piece I'm starting here is called "Nanning 374." It's a maquette (small version) for a life-size horse I was commissioned to sculpt. Nanning uses a standard armature with the post coming out of his belly. If there's a need to elevate a piece so you have room to sculpt detailed things under him, or if you're sculpting a human, you use a "back-iron armature" which comes out of the side of a horse or the back of a human. The first photo shows Nanning with clay covering the ends of the toothpicks I've shoved into each end of the plumbing T in the center of his body to keep the three wires there from moving (three wires - one for the head to the tail, one each for each parallel set of legs).
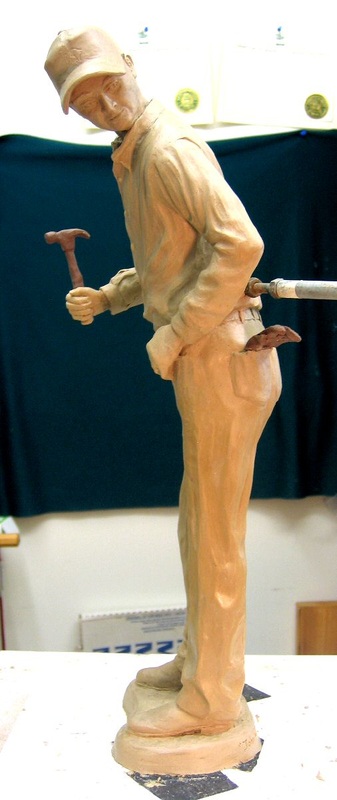
The second photo shows "John" which is part of my "Just Trying' to Help" bronze. You can see the pipe coming into his back, which is called a "back iron armature" and is used for humans and for jumping animals - anything where you might need to detail something under the subject. For a back iron armature on a horse, I use a 90 degree angle iron to join the horizontal pipe to the vertical support that is bolted to the working surface. I use a special armature for humans where the joint that attaches to the vertical support is adjustable so I can make people of varying heights.
The second photo shows "John" which is part of my "Just Trying' to Help" bronze. You can see the pipe coming into his back, which is called a "back iron armature" and is used for humans and for jumping animals - anything where you might need to detail something under the subject. For a back iron armature on a horse, I use a 90 degree angle iron to join the horizontal pipe to the vertical support that is bolted to the working surface. I use a special armature for humans where the joint that attaches to the vertical support is adjustable so I can make people of varying heights.
The wooden working surface is either Formica-covered or is shellacked so the clay (which is plastilene, an oil-based clay that does not harden or dry out) will not stick to it, and so there won't be any splinters to get in the clay (or the sculptor's hands!). When steel or galvanized pipes are used, they need to be sprayed with polyurethane to coat it, or painted with shellac, to seal it away from the plastilene. Steel and plastilene together create a chemical reaction that causes the clay to get black and crumbly where it touches the pipe, which makes the sculpture loose on the armature and will damage it. As long as the pipe is sealed, there should be no problems.
I begin by cutting aluminum armature wire longer than it needs to be. The heavy wire will support the horse's head, neck, body and tail. Smaller wire is wrapped around it to give the clay something to "bite" so it won't slide around on the wire. Smaller wires are doubled and twisted to form each leg, or each pair of legs, or as in this case (for a larger sculpture), heavy wire is used instead, with wire wrapped around it because this is a large piece with thick legs. You need to do whatever works best for the piece.
The tighter the small wires are twisted, the stronger they are and the more clay they'll support, so for tightly folded legs, or legs extended out (not hanging down), the wire has to be tightly twisted to support the clay's weight. Aluminum wire is used because it's both strong enough to hold the clay and soft enough to easily manipulate, plus it doesn't have any chemical reaction with clay. Steel coat hanger wire, for instance, would have a chemical reaction with clay, and is brittle and inflexible (for fine or curved movement), so it isn't the best choice for armature wire. And yes, there's a copper wire in Nanning's armature - it was the right size and I'd run out of aluminum wire. Copper wire has to be crimped with nippers at the joints or it won't bend cleanly, so I don't use it often.
The tighter the small wires are twisted, the stronger they are and the more clay they'll support, so for tightly folded legs, or legs extended out (not hanging down), the wire has to be tightly twisted to support the clay's weight. Aluminum wire is used because it's both strong enough to hold the clay and soft enough to easily manipulate, plus it doesn't have any chemical reaction with clay. Steel coat hanger wire, for instance, would have a chemical reaction with clay, and is brittle and inflexible (for fine or curved movement), so it isn't the best choice for armature wire. And yes, there's a copper wire in Nanning's armature - it was the right size and I'd run out of aluminum wire. Copper wire has to be crimped with nippers at the joints or it won't bend cleanly, so I don't use it often.
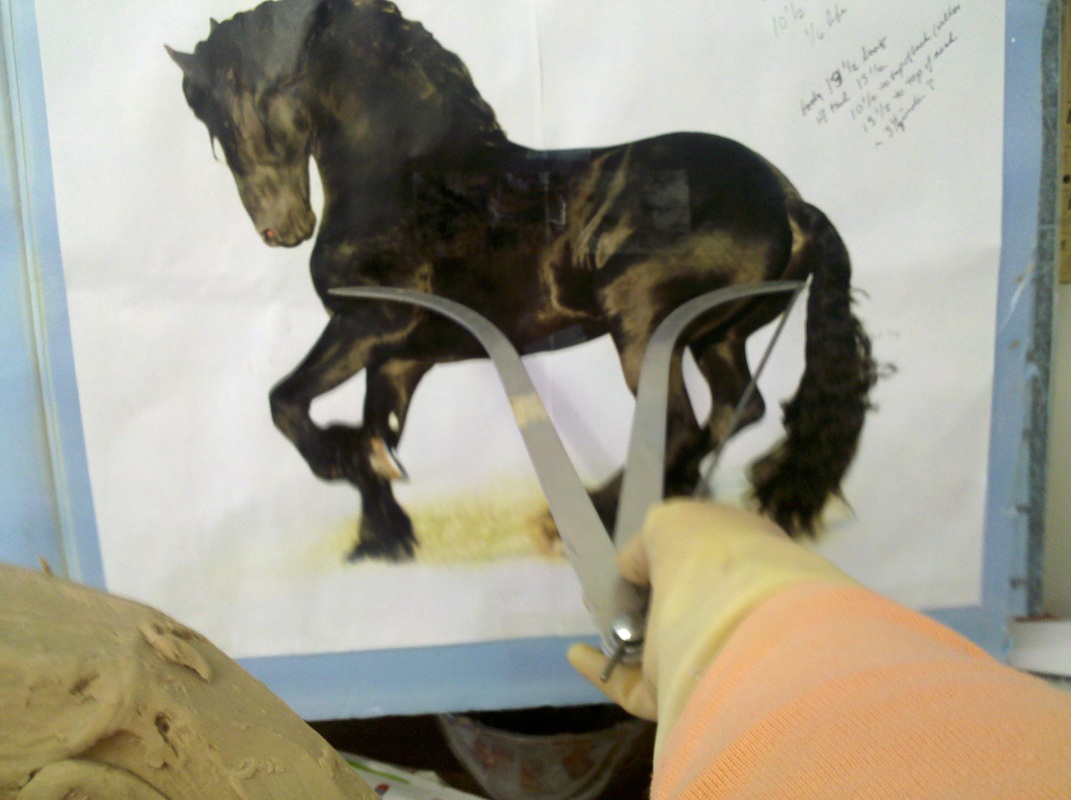
For Nanning, since this is a very complex pose and I didn't have the opportunity to measure him in person, I blew up the photo for the pose to about the size I want the sculpture to be. Fortunately, it's a profile shot of his head, neck and shoulder (his body is bent so his rump is closer to the camera, in case you didn't notice - that's part of what made this a hard pose to sculpt), so I could take the basic measurements I needed to get the rest of him in proportion. (Horse measurements are based on head lengths - one head equals the length of the atlas to the front of the shoulder, equals the point of shoulder to the withers, equals the stifle to the point of hock, etc. For a complete chart, see my book, Sculpting 101: A Primer for the Self-taught Artist). I have a vinyl glove on to protect my hand from the hot clay (I warmed it in a crock pot used as a double boiler - a bowl in the crock for the clay, water in the crock for the double-boiler effect).
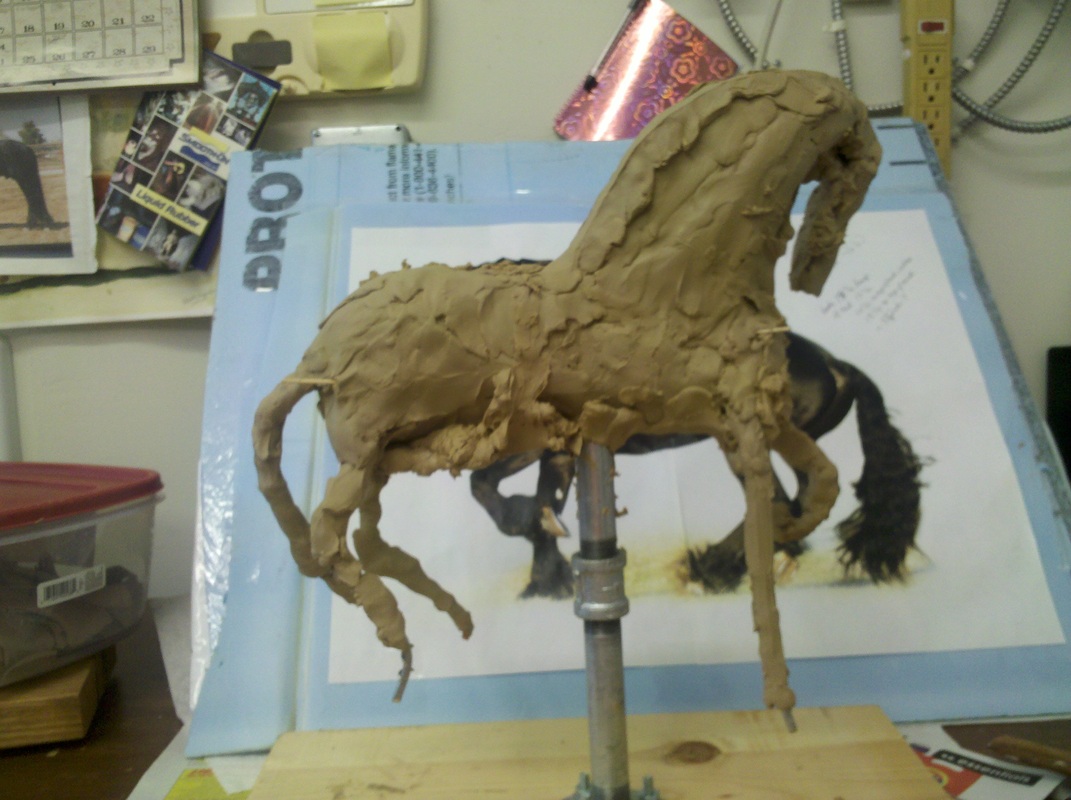
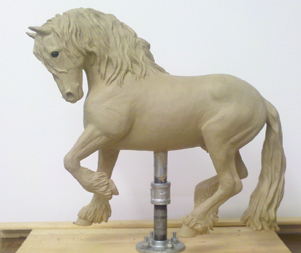
Shown above, Nanning is starting to take shape. First I cover the armature in clay so there are no sharp pieces to catch me unaware, and to stabilize the armature in the position I want. Then I start building the body masses, laying the clay on in the shape and size of the musculature whenever possible. The horse will soon take shape from here. Here I'm using hard clay to be a good support for the pose. I normally use soft clay, and will do so for the rest of this sculpture once the basic shapes are locked in place with the hard clay. On a smaller piece, I'd use soft clay everywhere. This piece is 1/7 life-size of a 17 hand horse.
"Nanning" about half done.
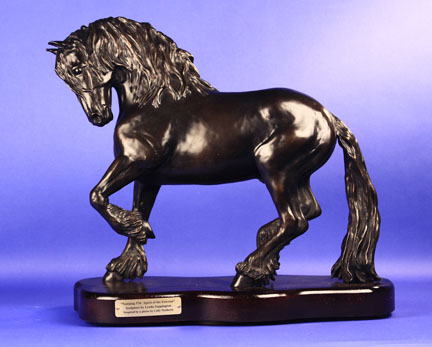
And here's the completed clay (above) and (below) the bronze of "Nanning." I hope this little tutorial has helped you understand sculpture better!
All photos, art and text copyright (C) Lynda Sappington. All Rights Reserved.
