Installing a Life-size Bronze
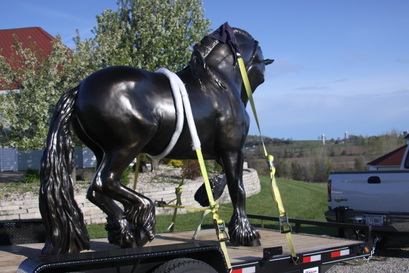
First of all, how do you get a big sculpture from the foundry (in Oregon) to the site (in Wisconsin, in this case)? On an open flatbed trailer (left). The horse is 8' tall, over 9' long and 2000 lbs. He was bolted to the trailer by his three points of contact with the ground (two hooves and his tail) and strapped down with a long racheting strap wrapped in cloth and then plastic around his middle, and another cushioned by a towel over his neck. The lacquer on his middle was slightly marred by the plastic wrapping because it got rained on the first night out and the plastic held the rain against it - at least that's the theory. My foundry owner, who delivered the piece, brought patina supplies with him and repaired it so you'd never know there was a problem. (The repair was the last step, done after the installation was complete.)
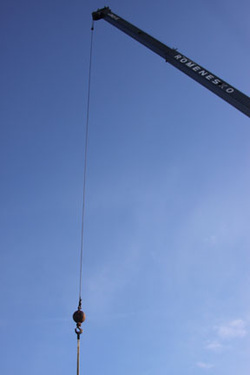
The crane was HUGE!
The threaded rods used to attach him to the trailer were replaced by stainless steel 1" thick, 12" long threaded rods for the installation
.
The crane was HUGE! It had to lift things ABOVE the 37 foot high flagpoles nearby. The crane operator worked with "surgical skill" as my husband put it.
.
The crane was HUGE! It had to lift things ABOVE the 37 foot high flagpoles nearby. The crane operator worked with "surgical skill" as my husband put it.
Lifting the horse off the trailer
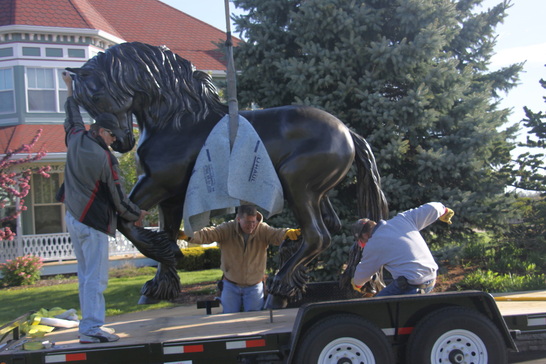
The horse had ONE strap around his middle when he was lifted! I was nervous about it, but my foundry owner knows what he's doing. He got it positioned correctly the first try. The crane operator lifted it off the trailer a tiny bit to see if it was balanced and it was. A blanket was used to keep the strap from rubbing the horse's finish. It was amazing to see that huge bronze just spinning in the air a few inches above the grass while the installation site was being prepared. (The slide show below shows a few pics of the piece spinning. The rods in his hind foot and tail were the ones that held him on the trailer. They will be replaced by stainless steel rods when he's installed.)
For those who ride dressage - the strap was exactly where the "medicine ball" should be if you ride biomechanically.
For those who ride dressage - the strap was exactly where the "medicine ball" should be if you ride biomechanically.
Marking where to drill
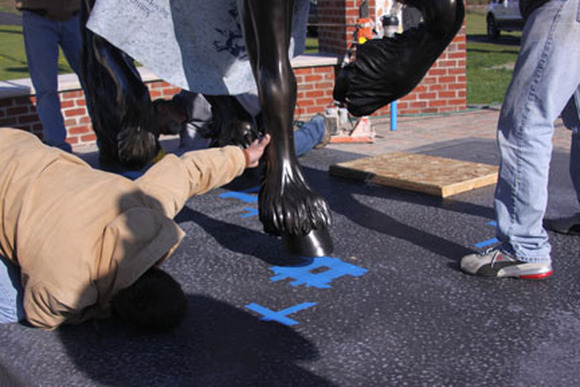
A template was made based on the holes in the trailer, then transferred to the black concrete plinth that had been made for the horse.
They marked the spots where the holes needed to be and used a drill that drills a circle, not a hole, to make the holes. They removed the cores after the drilling was complete (12" deep holes, IIRC). The 12" stainless steel rods were screwed 1 1/2" into the horse and the rest would be in the holes.
They marked the spots where the holes needed to be and used a drill that drills a circle, not a hole, to make the holes. They removed the cores after the drilling was complete (12" deep holes, IIRC). The 12" stainless steel rods were screwed 1 1/2" into the horse and the rest would be in the holes.
The drill
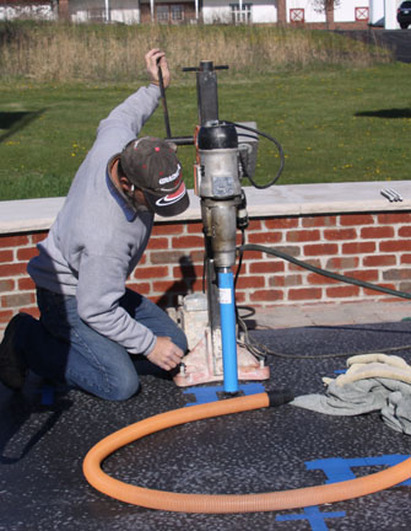
This is the drill. It took quite a while to drill each hole. After the core was removed, the installers aimed a heat gun into the hole to dry it (the drilling was done with water to keep the bit cool - they used a wet-dry vacuum to suck up the excess water and keep the site pristine). They blew air into the hole to remove any debris and made sure the hole was dry before going further. My foundry guy said he doesn't dry out the holes - the moisture left keeps the epoxy from "kicking" too soon - but he left them to do their own method and just told me about it, since I was there to learn.
The rods aligned with the holes perfectly!
Once they had the holes prepared, they lowered the horse so the rods were about halfway into the holes and started putting epoxy in. They were using a quick-set epoxy, which would prove to be a problem.
The rods aligned with the holes perfectly!
Once they had the holes prepared, they lowered the horse so the rods were about halfway into the holes and started putting epoxy in. They were using a quick-set epoxy, which would prove to be a problem.
Putting epoxy in the holes
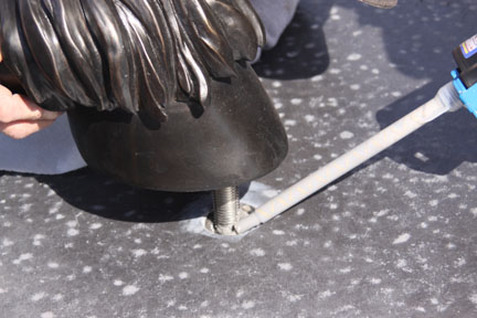
Here you see one of the holes being filled with epoxy.
The installers said there won't be any problem with freezing and thawing damaging the installation (the epoxy and concrete under the horse) because the final step is to put sealant (a specific kind of caulk that also matches the color of the horse, not silicon, because silicon will peel off over time) around each part that touches the ground to keep moisture out.
The installers said there won't be any problem with freezing and thawing damaging the installation (the epoxy and concrete under the horse) because the final step is to put sealant (a specific kind of caulk that also matches the color of the horse, not silicon, because silicon will peel off over time) around each part that touches the ground to keep moisture out.
The artist's signature
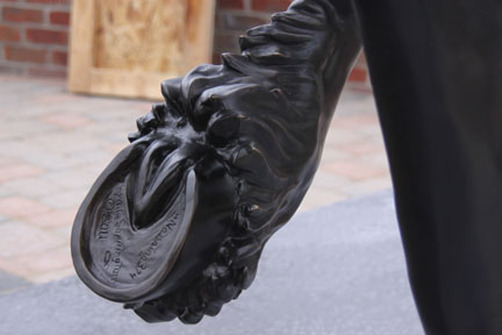
I ALWAYS sign my work, usually with my complete name, the Christian fish and the copyright symbol and year. This picture shows where I signed his hoof. I signed it, "Nanning 374 Lynda Sappington (c) 2011 <><"
Mane detail
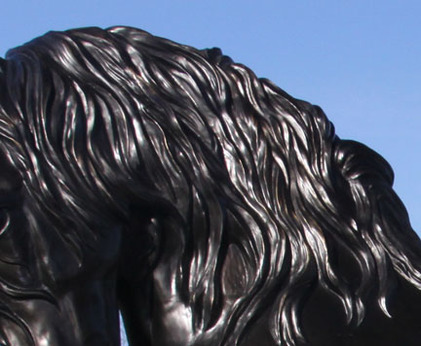
I love how his feathers (the long hair on his legs) turned out, and his mane and tail are gorgeous. The mane catches the light in a beautiful way.
Detail of feathers
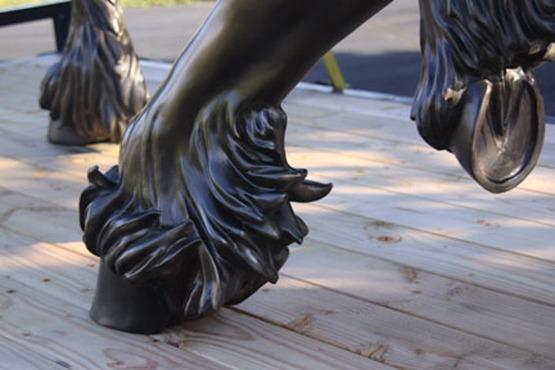
I always have the patina on my pieces buffed back on the high spots so there's even more "dimension" to the piece. I also use transparent patinas so you can see the metal through the color. The glitter of the bronze through the patina helps the horse look "alive" because real horses' coats often have a metallic sheen.
I'm really pleased with how the feathers on this foot turned out. I struggled for a long time trying to make the hair look right as this foot hits the ground. I must have sculpted it six or seven different ways before I called my friend and mentor, Marcia Van Woert, who has sculpted Afghan hounds for years, so she KNOWS hair! She helped me "organize" the hair so the splash looks good and rain will flow off it well rather than pooling somewhere in the detail.
I'm really pleased with how the feathers on this foot turned out. I struggled for a long time trying to make the hair look right as this foot hits the ground. I must have sculpted it six or seven different ways before I called my friend and mentor, Marcia Van Woert, who has sculpted Afghan hounds for years, so she KNOWS hair! She helped me "organize" the hair so the splash looks good and rain will flow off it well rather than pooling somewhere in the detail.
Installation site
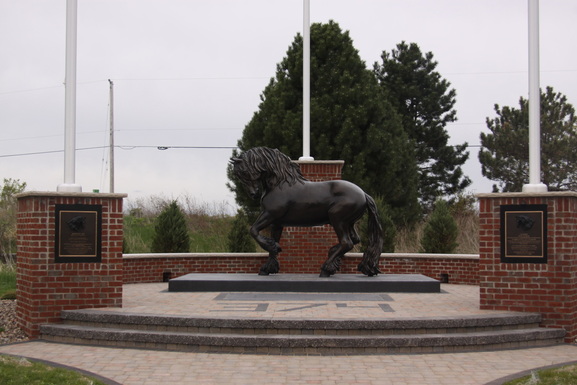
Here he is in the beautiful setting designed for him by his owner, Scott Kelnhofer of Fenway Farms, Hortonville, Wisconsin. The raised wall is shaped like Nanning's front shoe. The number "374" is in black cobblestones in the cobblestone terrace made to resemble the streets of Holland where Nanning came from. The black rectangle in front of the plinth (the raised platform where the bronze stands) has imprints of Nanning's shoes. The bronze plaques on the columns have busts I sculpted and words by Scott Kelnhofer. Nanning's limestone stall sign is recessed in the plinth in front of the bronze in line with the number "7". The flagpoles are 374" tall, I believe, and bear the Friesland flag, the American flag in the center, and the Fenway Foundation flag on the right. There are also three gorgeous original mosaics showing Nanning in different poses with leaves falling around him symbolizing spring, summer, fall and winter. The artist who did those did spectacular work on them. I haven't contacted him for permission to show them, so I'm not posting the pictures I took of them.
Memorial Plaque
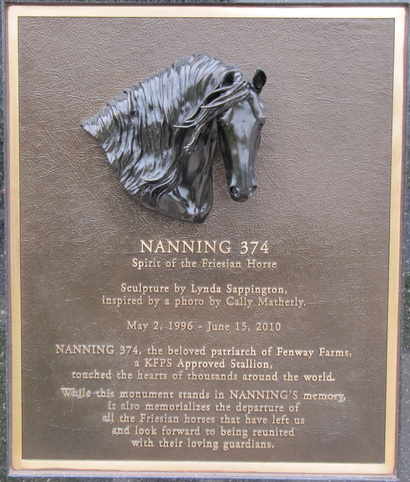
The plaques are on the left and right columns where the heel caulks would be on the horseshoe. I sculpted one bust, then had the company that enlarged the sculpture scan the original sculpture and copy it out facing the other way. That piece was the basis of this bronze.
The plaque reads:
Nanning 374
Spirit of the Friesian Horse
Sculpture by Lynda Sappington
Inspiredby a photo by Cally Matherly
May 2, 1996 - June 15, 2010
NANNING 374, the beloved patriarch of Fenway Farms,
a KFPS Approved Stallion,
touched the hearts of thousands around the world.
While this monument stands in NANNING'S memory
it also memorializes the departure
of all the Friesian horses that have left us
and look forward to being reunited with their loving guardians.
Finished sculpture: "Nanning 374, Spirit of the Friesian"
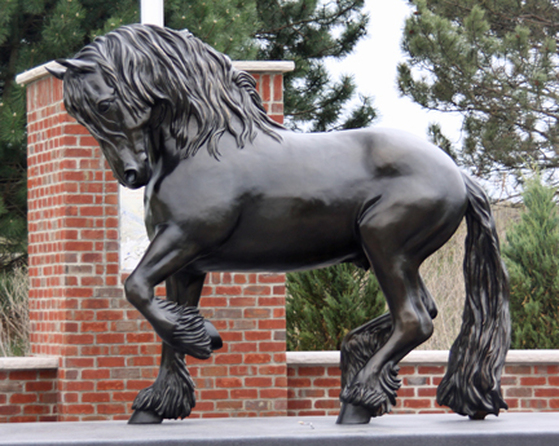
He is just over 8 feet tall and 9 feet 4 inches long, and weighs 2000 lbs. You can order one of these for your own farm if you'd like. Please see the "Nanning 374 life-size" page for information.
